If you’re gearing up for your first Laser patch test, you might be scratching your head over timing and prep. It’s just a small zap after your initial chat with the practitioner to find the best settings for your skin and hair. In this guide, you’ll see when to book the test, how to get your skin ready, and what to watch out for once it’s done.
Key Takeaways
- Book your Laser patch test at least 48 hours before your first session and cover every area you want treated.
- Keep the skin clean and shaved—no plucking or waxing—and skip lotions or harsh products beforehand.
- Watch the patch for redness or other reactions and report anything odd to your practitioner right away.
.
Scheduling Your Laser Patch Test
Consultation And Test Timing
Okay, so you’re thinking about laser hair removal? Ace! The patch test is a super important step, and it all starts with booking a consultation. This isn’t just a quick chat; it’s where you’ll discuss your hair removal goals, medical history, and any medications you’re on. They’ll also explain how laser hair removal works, the different types of lasers, and what to expect during treatment. It’s a good idea to ask if the person doing your consultation will be your regular practitioner, and what their experience is.
- Treatment goals and expectations
- Current method of hair removal
- Details about your medical history (including any current medications)
.
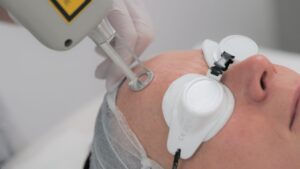
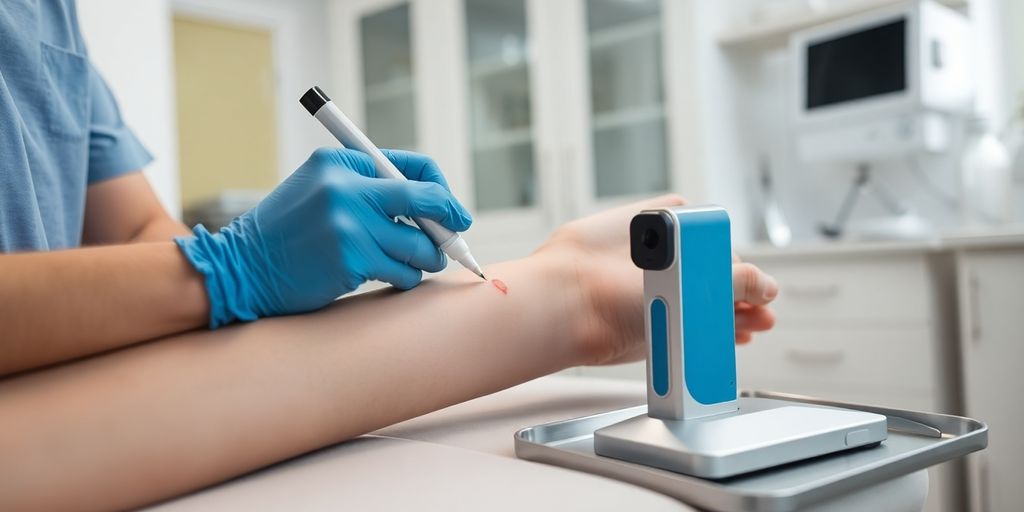
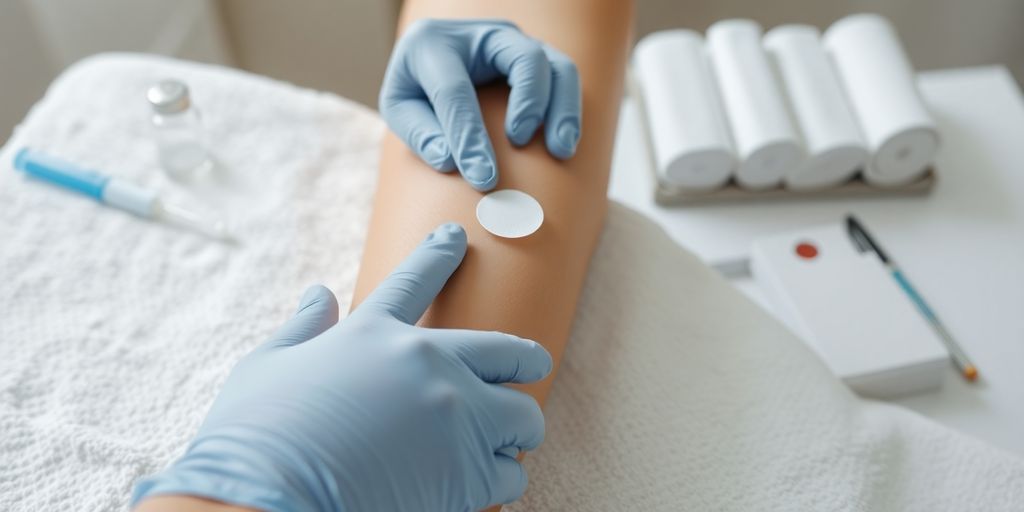
The patch test itself usually happens right after the consultation, provided you’re happy to proceed. It’s a quick procedure, but vital for ensuring your safety and the effectiveness of the treatment. The clinic should perform a patch test on all the different areas of your body where you are considering undertaking a treatment. Remember, it needs to be done at least 48 hours before your first full session to allow time for any reactions to show. This is so they can adjust your treatment plan if needed. The consultation process typically takes an hour.
Treatment Areas Under Evaluation
During your consultation, make sure you discuss all the areas you’re considering for laser treatment. The practitioner will then perform patch tests on each of these areas. This is because your skin and hair can vary quite a bit across your body, and the laser settings need to be adjusted accordingly. Some clinics might only do a single patch test, usually on your arm, but the best practise is to test every area you’re interested in. This way, they can determine the most effective laser parameters for your specific skin and hair type in each location. Plus, it helps identify any potential adverse effects before you commit to a full session. Remember, the laser settings need to be spot on!
Preparing Your Skin For A Patch Test
Getting your skin ready for a patch test is pretty straightforward, but it’s important to follow the guidelines to ensure the test is accurate and safe. Think of it as prepping a canvas before painting – the better the prep, the better the result. Basically, you want your skin to be in its most natural state, free from anything that could interfere with the laser’s interaction with your skin.
Hair Removal And Hygiene
First things first: hair removal. Shaving the area is usually recommended about 24 hours before your patch test. This allows the laser to target the hair follicle directly without surface hair getting in the way. But here’s the kicker: avoid waxing, plucking, or using hair removal creams in the weeks leading up to your test. These methods remove the hair from the root, which is what the laser needs to target. Think of it like trying to start a car without an engine – it just won’t work. Also, make sure the area is clean. No lotions, makeup, or anything else that could create a barrier between the laser and your skin. Just a gentle wash with soap and water will do the trick. This helps the laser hair removal treatment work effectively.
Avoiding Potential Irritants
Now, let’s talk about what not to do. For at least a week before your patch test, ditch any harsh skincare products. That means retinoids, exfoliants, and anything with strong acids. These can make your skin more sensitive and prone to irritation, which could skew the results of the test. Stick to gentle cleansers and moisturisers. Also, avoid prolonged sun exposure or tanning. Lasers are calibrated to work with your natural skin tone, and a tan can increase the risk of burns or pigmentation changes. Basically, treat your skin like it’s a delicate flower – gentle and protected.
Think of your skin as a blank slate. You want to remove anything that could interfere with the laser’s interaction with your skin, whether it’s hair, lotions, or sun tan. The goal is to get an accurate assessment of how your skin reacts to the laser, so you can have a safe and effective treatment.
Recognising And Reporting Reactions
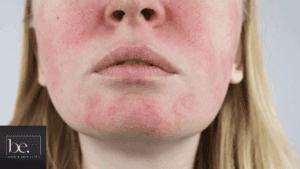
After the patch test, it’s all about keeping an eye on things. Your practitioner will give you specific instructions, but generally, you’ll need to monitor the test area for any signs of reaction, such as redness, itching, swelling, or blistering. These reactions are usually mild and temporary, but it’s important to report them to your practitioner. They can then adjust your treatment plan accordingly. Here’s a rough timeline of what to expect:
- Immediately after: Slight redness or warmth is normal.
- Within 24 hours: Any significant reactions should become apparent.
- After 48 hours: Contact your practitioner to discuss the results.
.
Don’t hesitate to get in touch if you’re unsure about anything. It’s always better to be safe than sorry. Remember, the patch test is there to help ensure your laser session is as safe and effective as possible.
Recognising And Reporting Reactions
So, you’ve had your patch test – good on you for being proactive! Now comes the slightly nerve-wracking bit: keeping an eye on things and knowing what’s normal (and what’s not). Don’t stress too much, though; most reactions are mild and easily sorted. The key is to be observant and communicate with your practitioner.
Monitoring The Test Area
Right, so you’ve got this little patch of skin that’s been zapped with a laser. What should you be looking for? Well, some redness is pretty standard, a bit like a mild sunburn. You might also feel a little warmth or tingling. That’s all usually fine and dandy. However, keep a close watch for anything that seems excessive or out of the ordinary.
Here’s a quick checklist:
- Redness: Is it just a bit pink, or is it angry-lobster red?
- Swelling: A little puffiness is okay, but significant swelling needs attention.
- Itching: Mild itching can happen, but intense, persistent itching is a red flag.
- Blisters: Any sign of blistering? That’s a definite no-no.
- Pain: A bit of sensitivity is normal, but actual pain? Get it checked.
.
Remember, everyone’s skin reacts differently. What’s mild for one person might be more significant for another. Trust your gut – if something doesn’t feel right, it probably isn’t.
Communicating With Your Practitioner
This is super important. Don’t be shy or think you’re being a bother. Your practitioner wants to know about any reactions you’re experiencing. They’re the experts, after all, and they can advise you on the best course of action.
Here’s what you should do:
- Take photos: A picture is worth a thousand words, especially when it comes to skin reactions. Take clear photos of the test area at regular intervals (e.g., morning and evening).
- Keep a diary: Jot down any symptoms you’re experiencing, when they started, and how they’re changing over time. This will give your practitioner a clear picture of what’s going on.
- Contact them promptly: Don’t wait until the last minute to report any concerns. The sooner you get in touch, the sooner they can help.
.
Your practitioner might ask you to come in for a check-up, or they might be able to advise you over the phone. Either way, don’t hesitate to reach out. It’s all part of ensuring your laser treatment is safe and effective. And remember, a little bit of communication can save you a whole lot of hassle (and potential skin drama) down the line!
Watch your skin for any odd signs after treatment. Notice redness, itching or swelling? Tell us right away. Visit belaserandskinclinic.co.uk to fill in a simple reaction report form and get fast support.
Conclusion
Alright, that’s your patch-test wrapped up. It might feel like an extra step, but trust me, it makes life easier later on. You’ve helped your therapist find the right settings, given your skin a chance to speak up, and dodged any nasty surprises before a full session. Just remember to shave (no plucking!), keep the area clean and jot down any questions—no matter how daft they seem. After that, you can stroll into your first laser session feeling a whole lot calmer. Here’s to smoother days ahead!
Book free patch test → Contact Us
Frequently Asked Questions
What is a patch test?
It’s a quick small test that checks how your skin and hair react to the laser before the full session.
Do I need to shave before the test?
Yes. Make sure the area is clean and freshly shaved. No waxing or plucking, or the laser won’t work right.
Will I be charged for the patch test?
Most places include it for free. But it’s best to ask your clinic to be sure.